This guide explains how to create a GDPR consent form and integrate it with your chat widget, ensuring that users give explicit consent before interacting with your AI assistant. This helps you maintain compliance with data protection laws and build trust with your users. We’ll cover step-by-step how to create the consent form, link it to your chat widget, and deploy it on your website.Documentation Index
Fetch the complete documentation index at: https://docs.insighto.ai/llms.txt
Use this file to discover all available pages before exploring further.
Prerequisites
✅ A Form with GDPR Consent FieldIt can also include any additional fields you want to capture (like name, email, or other information relevant to your chat interactions). ✅ A Chat Assistant Created to Meet Your Requirements
You should have your AI chat assistant already set up and configured according to your use case.
Create a GDPR consent field in form
- Create a GDPR Consent Form
Let’s start by creating a form that includes a GDPR consent field along with any additional fields you want to capture from users.
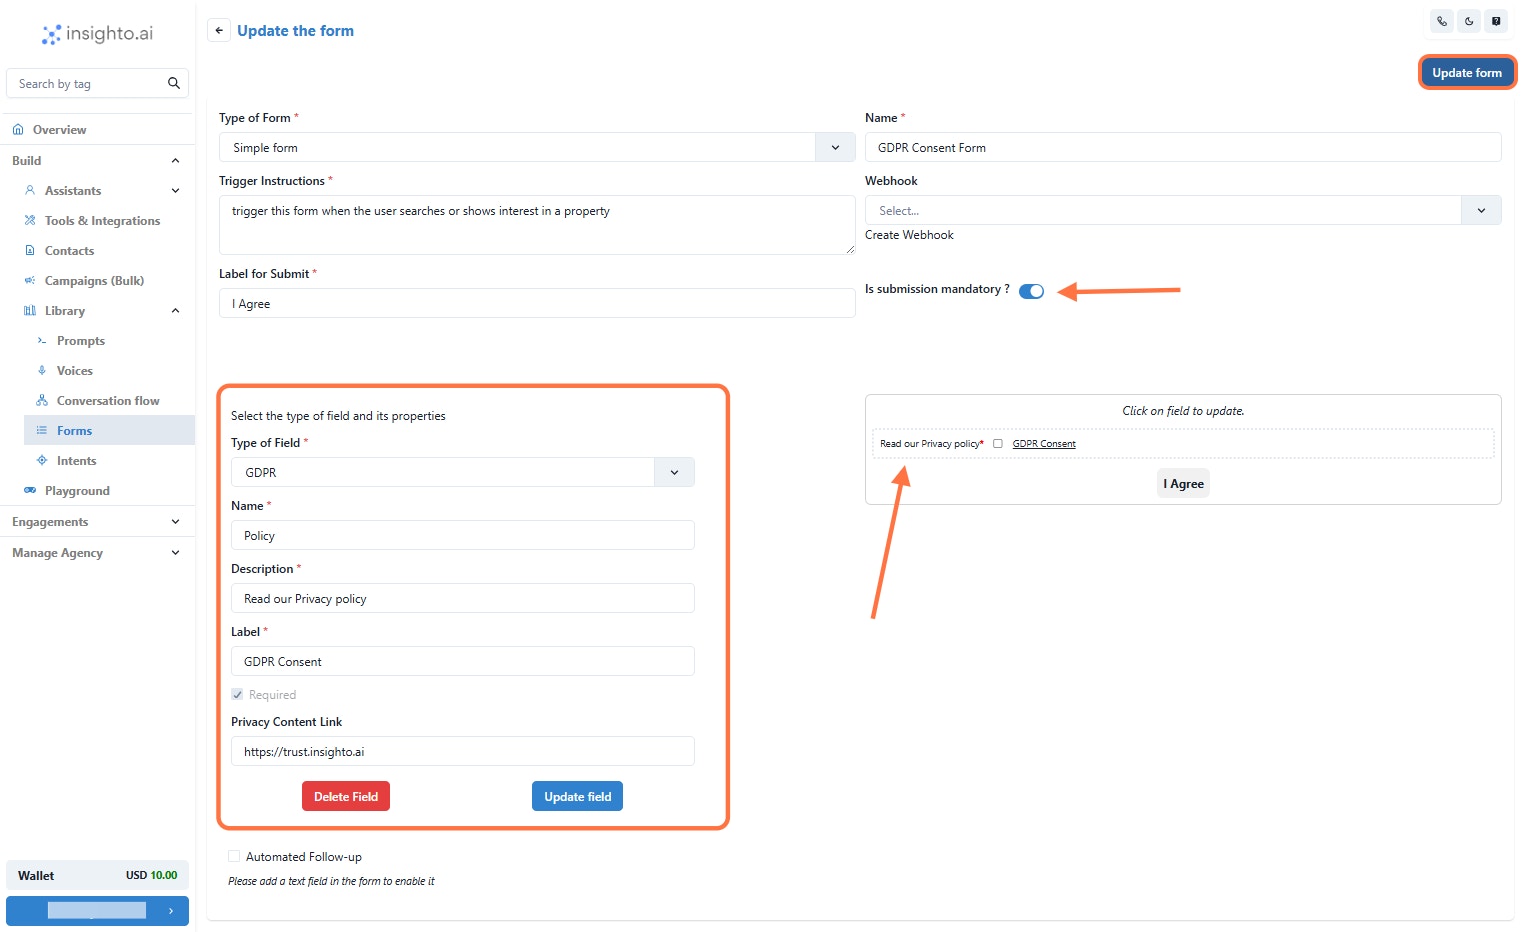
In your form builder, add a field of type GDPR (or similar, depending on your platform).
Be sure to include a link to your Privacy Policy in the field so users can review it before giving consent. 2⃣ Enable Mandatory Form Submission
In the form settings, toggle the option to make form submission mandatory.
This ensures that users must complete the GDPR consent and any other required fields before they can interact with the chat widget. 3⃣ Add Additional Fields (Optional)
Add any other fields you want to capture, such as name, email, phone number, etc.
Arrange these fields as needed to support your chat use case. 💡 Note: If you’re unsure how to create a form in your system, refer to the detailed guide linked Insighto.ai Forms - Insighto.ai Docs for step-by-step instructions.
Connect with Chat Widget
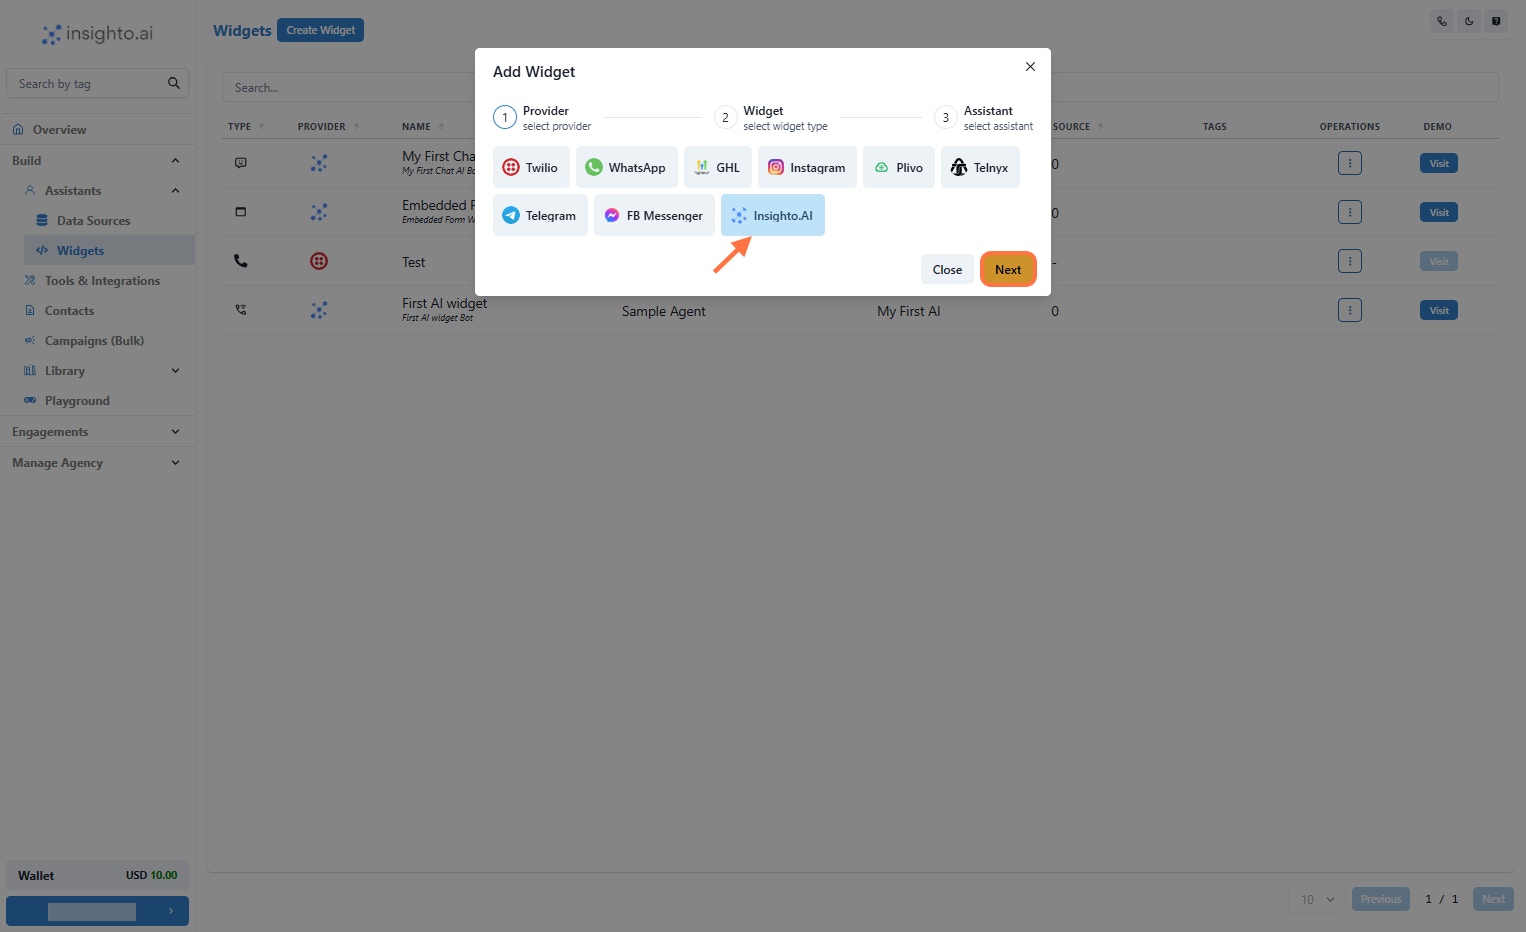
- Create a Widget and select provider type as “Insighto”
Under the widget section → Create Widget
Select provider type as “Insighto” and click Next
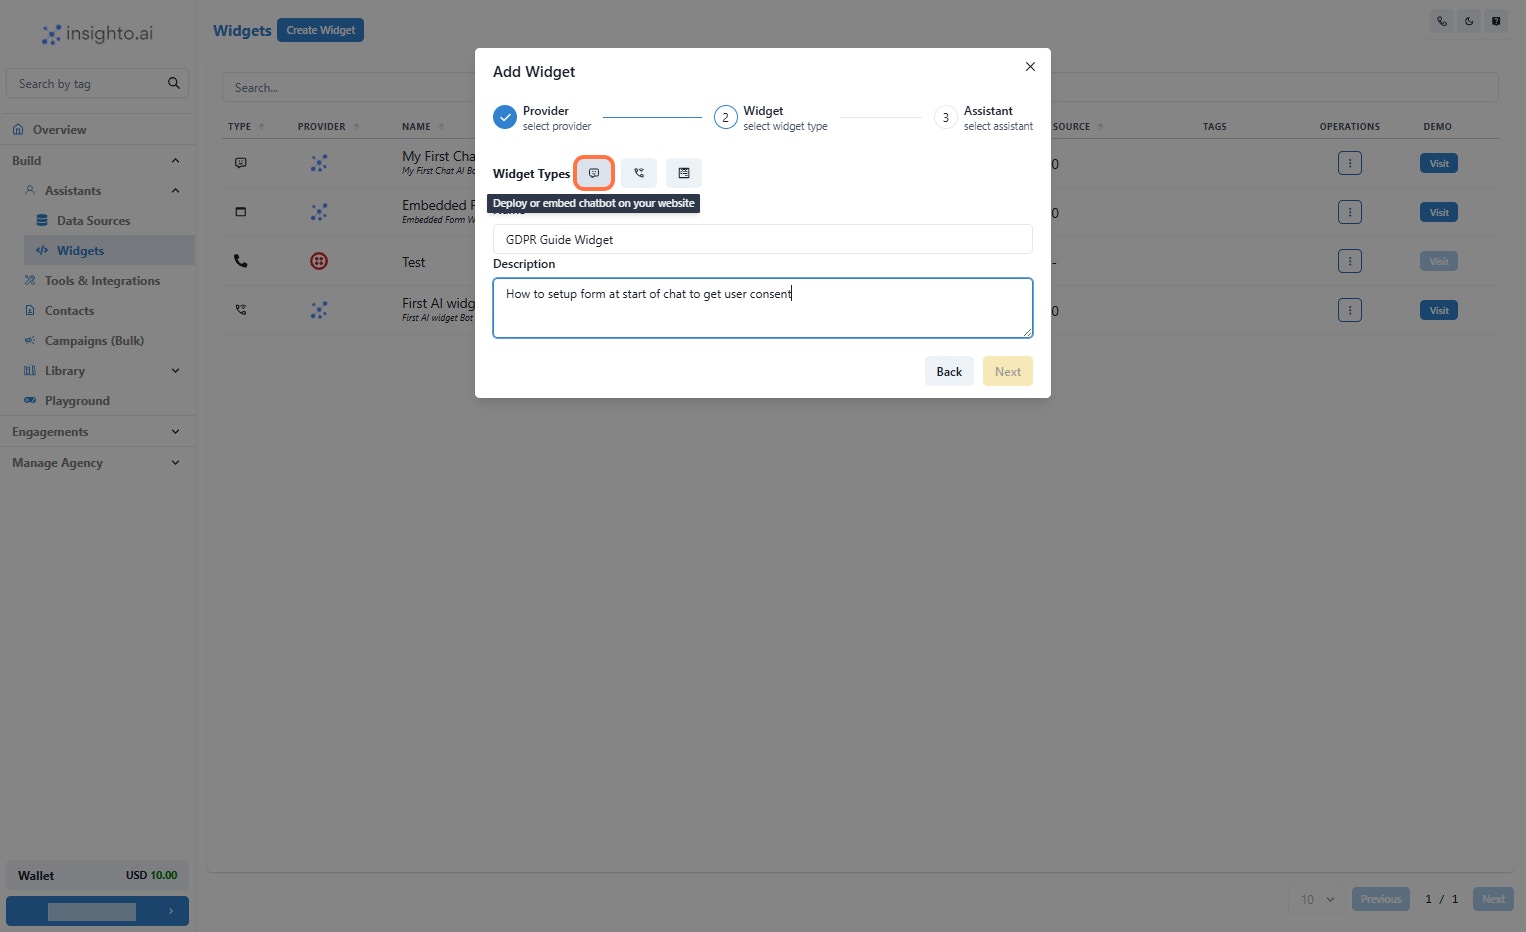
- Click on Embed AI Agent Chat as shown below
Enter the Name & Description of your widget
Click on Embed AI Agent Chat as shown below
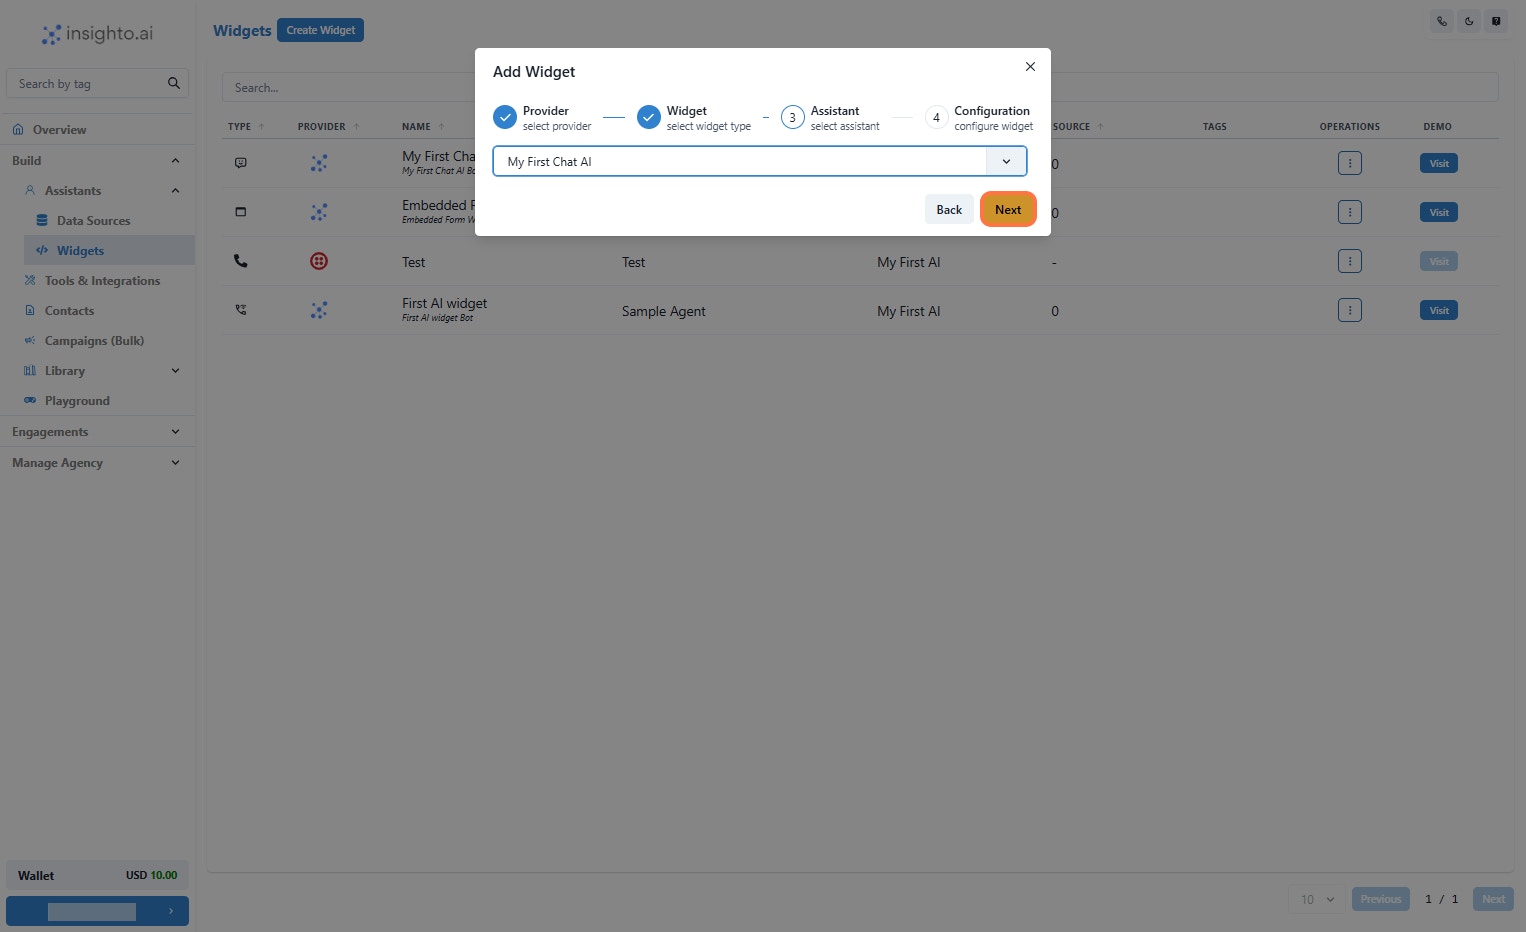
- Select the Assistant and click Next
From the Assistant dropdown, select the Chat assistant you just created.
- Connect the Form and Click on Finish
From the dropdown menu, select the form you just created.
After selecting the form, click on the Finish button to complete the setup.

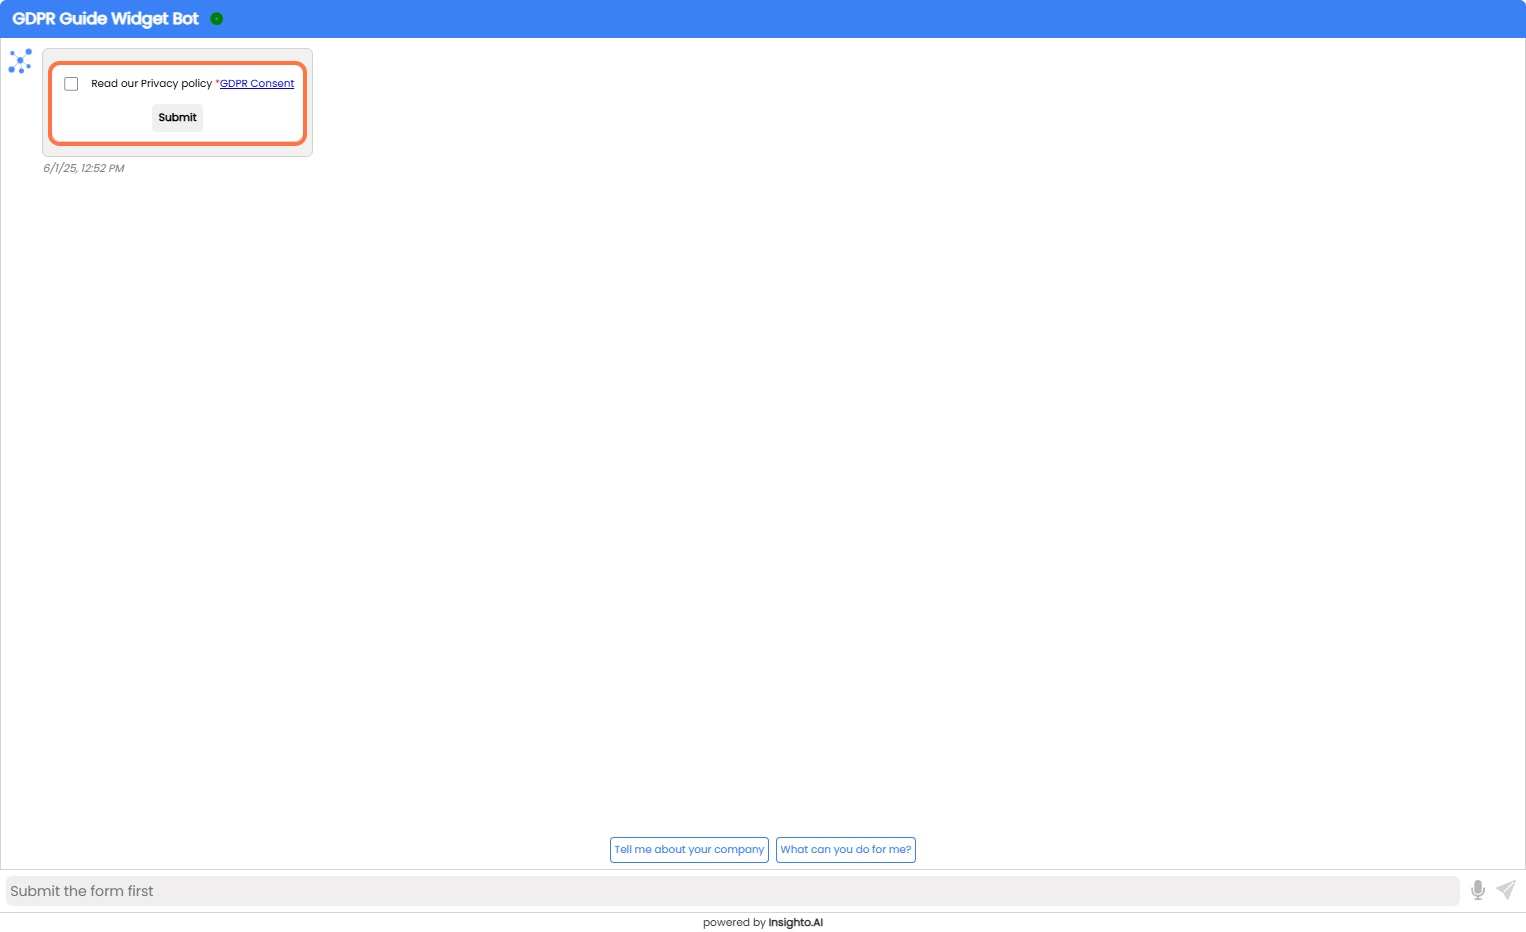
How it will appear?
- Open the Widget in Playground or Click visit
When users open the chat widget on your website, the GDPR consent form will be displayed right away.
Users must complete and submit the form before they can proceed to interact with the AI chat assistant. This ensures:
✅ Clear communication of your privacy practices.
✅ A smooth and compliant user experience. Until the form is submitted, users will not be able to start a conversation with the chat assistant.